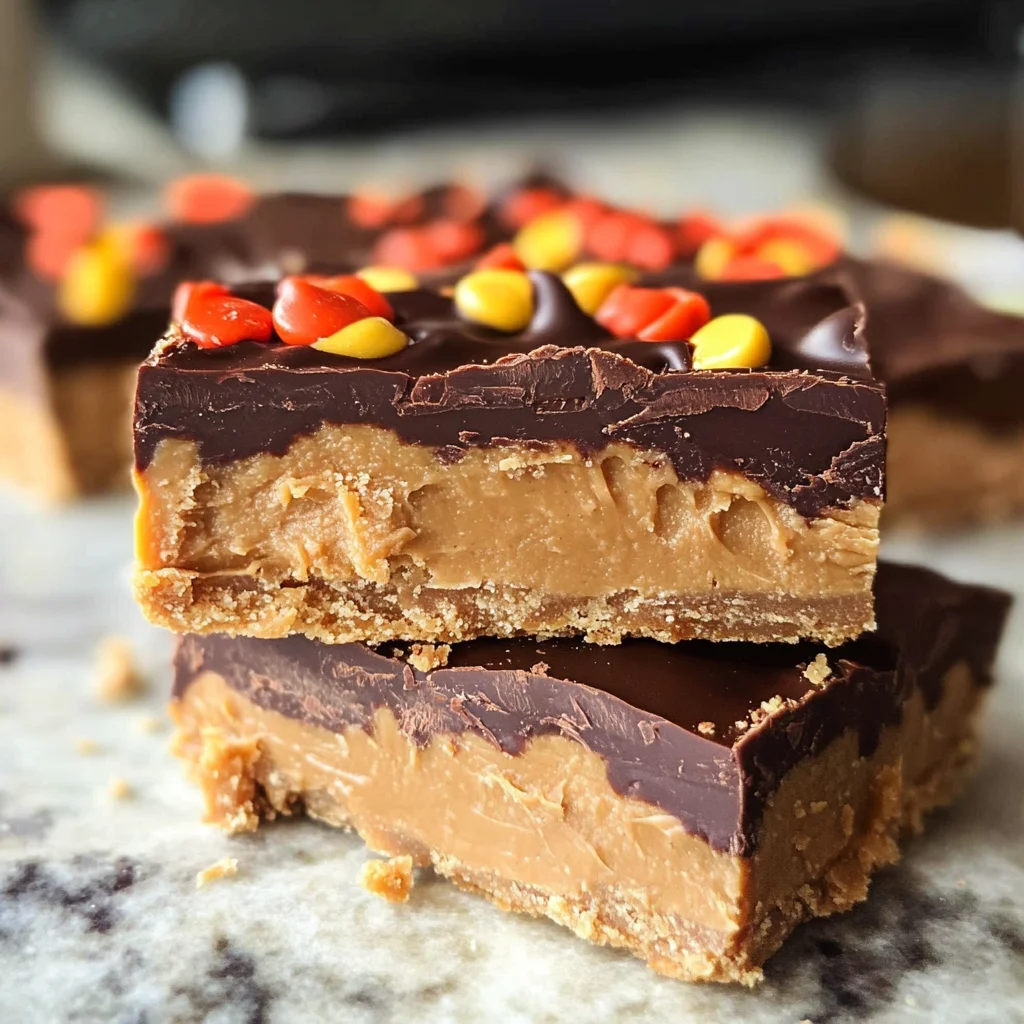
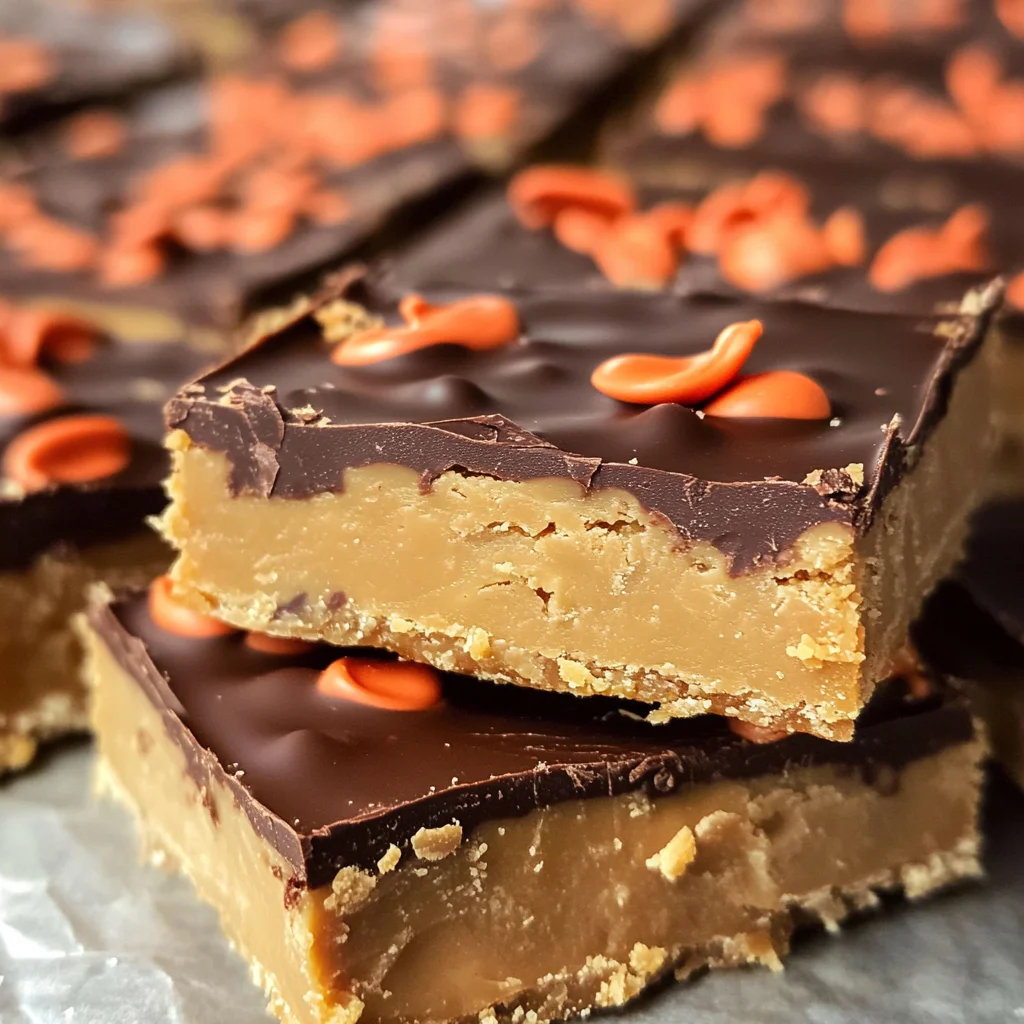
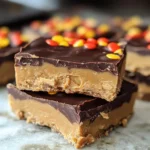
Reese’s Peanut Butter No-Bake Bars Recipe
If you’re looking for a quick and delightful dessert that will have everyone raving, you’ve come to the right place! The Reese’s Peanut Butter No-Bake Bars Recipe is my go-to treat when I want something rich, creamy, and utterly delicious without turning on the oven. These bars are perfect for busy weeknights or family gatherings because they come together in just minutes and can be made ahead of time.
What makes these no-bake bars extra special is their sweet, nutty flavor combined with a smooth chocolate topping. Each bite is a little piece of heaven, making them a favorite among friends and family alike!
Why You’ll Love This Recipe
- Super Easy to Make: With just a few simple steps, you’ll have an incredible dessert ready to chill.
- Family-Friendly Treat: Kids and adults both adore the combination of peanut butter and chocolate!
- Perfect for Any Occasion: Whether it’s a potluck or movie night, these bars are always a hit.
- Make-Ahead Convenience: Prepare them in advance and simply slice them when you’re ready to serve.
- Decadent Flavor: Enjoy the rich taste of creamy peanut butter paired with semisweet chocolate.
Ingredients You’ll Need
These Reese’s Peanut Butter No-Bake Bars require just a handful of wholesome ingredients that you probably already have in your pantry. Let’s gather what we need!
For the Base
- 1 cup (240g) creamy peanut butter
- 1 cup (225g) unsalted butter, melted
- 2 cups (250g) powdered sugar
- 2 cups (200g) graham cracker crumbs
For the Topping
- 1½ cups (260g) semisweet chocolate chips
- ½ cup (120g) creamy peanut butter
Variations
One of the best things about this recipe is how flexible it is! Feel free to get creative with these fun variations:
- Add Crunch: Mix in some chopped nuts or crushed pretzels for an extra crunch.
- Go Darker: Swap out semisweet chocolate chips for dark chocolate chips if you prefer a richer flavor.
- Try Different Nut Butters: Use almond or cashew butter instead of peanut butter for a fun twist.
- Mix in Extras: Add mini marshmallows or shredded coconut for additional texture and flavor.
How to Make Reese’s Peanut Butter No-Bake Bars Recipe
Step 1: Combine the Base Ingredients
In a large mixing bowl, combine the melted butter, creamy peanut butter, powdered sugar, and graham cracker crumbs. Mix well until everything is smoothly incorporated. This step creates a deliciously rich base that sets the stage for our bars.
Step 2: Press into the Dish
Once your mixture is smooth, press it evenly into the bottom of a 9×13-inch baking dish lined with parchment paper. This ensures that your bars will hold their shape when you cut them later. Make sure to pack it down well!
Step 3: Melt the Chocolate Topping
Next, in a microwave-safe bowl, add the semisweet chocolate chips along with ½ cup of creamy peanut butter. Heat this mixture in 30-second intervals, stirring each time until everything is nice and melted. This step gives us that luscious topping that perfectly complements our base!
Step 4: Pour and Spread
Pour the melted chocolate mixture over your pressed peanut butter layer. Use a spatula to spread it evenly across the top. This creates that beautiful glossy finish that makes these bars so inviting.
Step 5: Chill Until Firm
Now it’s time to refrigerate! Place your dish into the fridge for at least 2 hours or until firm. This chilling time allows all those flavors to meld together beautifully.
Step 6: Slice and Serve
After chilling, let your bars sit at room temperature for about 5 minutes before slicing. Cut into squares or bars as desired—and enjoy every delicious bite!
Pro Tips for Making Reese’s Peanut Butter No-Bake Bars Recipe
Creating the perfect batch of these no-bake bars is a breeze with a few useful tips!
-
Use room temperature ingredients: Allowing your peanut butter and butter to come to room temperature ensures they blend smoothly, creating a creamy texture that holds up well.
-
Line the baking dish: Always line your baking dish with parchment paper. This makes it super easy to lift the bars out once they’re set, preventing any sticking and messy clean-up.
-
Experiment with chocolate: If you want to mix things up, try using dark chocolate or even white chocolate for the topping. Different chocolates can add a unique flavor profile and make your bars visually stunning!
-
Chill thoroughly: Be patient! Letting the bars chill for at least 2 hours (or longer) helps them firm up nicely, making them easier to cut and giving them that perfect no-bake texture.
-
Store properly: Keep any leftovers in an airtight container in the refrigerator. They’ll stay fresh for up to a week, but I doubt they’ll last that long!
How to Serve Reese’s Peanut Butter No-Bake Bars Recipe
These delightful bars are not only delicious but can also be presented beautifully for any occasion. Here are some fun ideas on how to serve them!
Garnishes
- Chopped nuts: Sprinkle some chopped peanuts or walnuts on top for added crunch and flavor.
- Chocolate drizzle: Drizzle extra melted chocolate over the top just before serving for an elegant touch.
- Sea salt sprinkle: A light sprinkle of flaky sea salt can enhance the sweetness of the bars and balance the flavors perfectly.
Side Dishes
- Fresh fruit: Pair these bars with slices of strawberries or bananas for a refreshing contrast that complements their richness.
- Ice cream: Serve alongside vanilla or chocolate ice cream for an indulgent dessert experience. The cold creaminess pairs wonderfully with the chewy bars.
- Whipped coconut cream: For a dairy-free option, serve with whipped coconut cream. Its lightness beautifully balances out the richness of the bars.
- Coffee or tea: A warm cup of coffee or herbal tea makes for a cozy combination. The slight bitterness of coffee contrasts well with the sweet flavors of the bars.
Now that you have all these tips and serving suggestions, get ready to share this delightful treat with friends and family! Enjoy every sweet bite of your Reese’s Peanut Butter No-Bake Bars!
Make Ahead and Storage
These Reese’s Peanut Butter No-Bake Bars are perfect for meal prep! You can whip them up ahead of time and enjoy them throughout the week or serve them at gatherings. Here’s how to store and keep them fresh.
Storing Leftovers
- Store the bars in an airtight container.
- Keep them in the refrigerator for up to one week.
- If you plan to have them for a longer period, consider freezing.
Freezing
- To freeze, wrap each bar individually in plastic wrap or foil.
- Place wrapped bars in a freezer-safe bag or container.
- They can be frozen for up to 3 months for optimal freshness.
Reheating
- These bars are best enjoyed chilled, but if you prefer them slightly warmer:
- Let them sit at room temperature for about 10-15 minutes before serving.
- Avoid using a microwave as it may affect their texture.
FAQs
If you have any questions about making these delicious bars, you’re not alone! Here are some common inquiries that might help.
Can I make Reese’s Peanut Butter No-Bake Bars ahead of time?
Absolutely! These bars are great for meal prep. You can make them a few days in advance and store them in the refrigerator until you’re ready to enjoy.
What is the best way to store Reese’s Peanut Butter No-Bake Bars?
For best results, store your bars in an airtight container in the refrigerator. They will stay fresh for up to one week!
Can I use crunchy peanut butter instead of creamy?
Yes! If you love a bit of texture, feel free to substitute creamy peanut butter with crunchy peanut butter. It will add an extra layer of deliciousness to your bars.
How do I know when my Reese’s Peanut Butter No-Bake Bars are firm enough?
After refrigerating for at least 2 hours, they should be firm enough to slice. If they feel soft when pressing lightly on top, give them a bit more time in the fridge.
Are there any alternatives to semisweet chocolate chips?
Certainly! You can use dark chocolate chips or dairy-free chocolate chips as alternatives if you’re looking for something different or if you have dietary restrictions.
Final Thoughts
I hope you’re as excited to make these Reese’s Peanut Butter No-Bake Bars as I am! They’re not only incredibly easy but also packed with rich flavors that everyone will love. Whether you’re treating yourself or sharing with friends, these bars are sure to delight. Enjoy making this special treat and don’t forget to share your thoughts—I’d love to hear how they turn out!
Reese’s Peanut Butter No-Bake Bars
If you’re in search of a dessert that promises indulgence without the hassle of baking, look no further than this Reese’s Peanut Butter No-Bake Bars Recipe. This delightful treat combines creamy peanut butter and rich chocolate, making it an instant favorite among both kids and adults. Perfect for busy weeknights or family gatherings, these bars come together in just minutes and can be prepared ahead of time. With their sweet, nutty flavor and smooth chocolate topping, every bite is a little slice of heaven. Easy to make, versatile, and utterly delicious—these bars will have everyone asking for seconds!
- Prep Time: 15 minutes
- Cook Time: None
- Total Time: 0 hours
- Yield: Approximately 12 servings 1x
- Category: Dessert
- Method: No-Bake
- Cuisine: American
Ingredients
- 1 cup creamy peanut butter
- 1 cup unsalted butter, melted
- 2 cups powdered sugar
- 2 cups graham cracker crumbs
- 1½ cups semisweet chocolate chips
- ½ cup creamy peanut butter (for topping)
Instructions
- In a large mixing bowl, combine melted butter, creamy peanut butter, powdered sugar, and graham cracker crumbs. Mix until smooth.
- Press the mixture evenly into the bottom of a lined 9×13-inch baking dish.
- In a microwave-safe bowl, melt semisweet chocolate chips with ½ cup of creamy peanut butter in 30-second intervals until smooth.
- Pour the melted chocolate over the pressed peanut butter layer and spread evenly.
- Refrigerate for at least 2 hours until firm.
- Let sit at room temperature for 5 minutes before slicing into squares.
Nutrition
- Serving Size: 1 square (40g)
- Calories: 180
- Sugar: 12g
- Sodium: 75mg
- Fat: 11g
- Saturated Fat: 5g
- Unsaturated Fat: 6g
- Trans Fat: 0g
- Carbohydrates: 19g
- Fiber: 1g
- Protein: 3g
- Cholesterol: 15mg