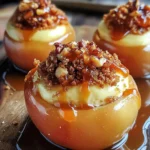
Cheesecake Stuffed Apples: A Delicious Twist on a Classic Dessert
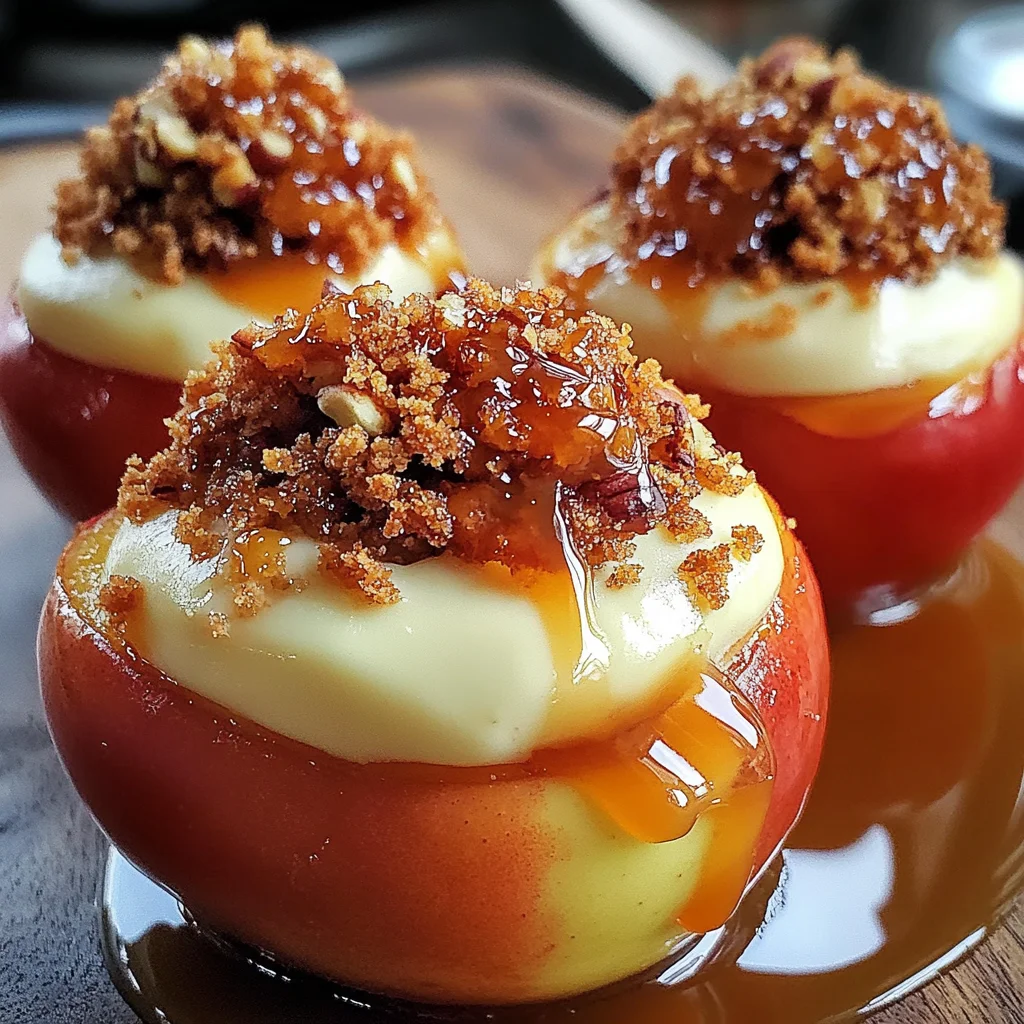
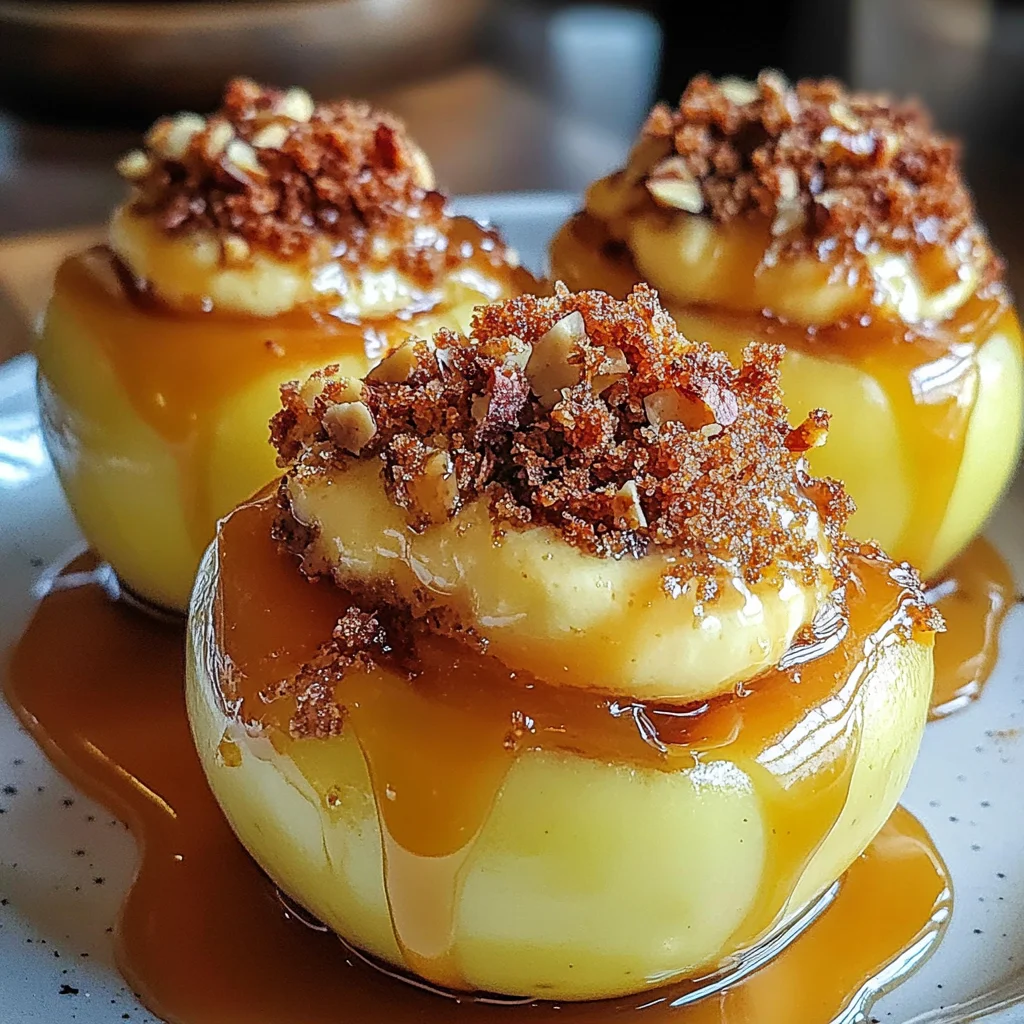
If you’re looking for a dessert that brings warmth and joy to any gathering, then you’ll love these Cheesecake Stuffed Apples: A Delicious Twist on a Classic Dessert. Imagine tender, baked apples bursting with rich, creamy cheesecake filling and drizzled with sweet caramel sauce. This delightful treat is not only cozy and comforting but also incredibly easy to prepare, making it perfect for busy weeknights or family celebrations.
I absolutely adore this recipe because it combines the wholesome goodness of fruit with the indulgent flavors of cheesecake. Whether you’re hosting a dinner party or just treating yourself after a long day, these stuffed apples are sure to impress everyone at the table!
Why You’ll Love This Recipe
- Easy to make: With simple steps and straightforward ingredients, you’ll have these delicious desserts ready in no time.
- Family-friendly: Kids and adults alike will love the combination of sweet apples and creamy filling—it’s a hit with everyone!
- Perfect for any occasion: Whether it’s a cozy night in or a festive gathering, these apples add that special touch to your dessert table.
- Make-ahead convenience: You can prepare them in advance and bake just before serving, making your life easier when entertaining guests.
- Delicious flavor: The blend of cream cheese, cinnamon, and caramel creates an irresistible flavor profile that you’ll crave again and again.
Ingredients You’ll Need
Let’s gather our ingredients! You’ll find that they are simple and wholesome, perfect for creating these delightful cheesecakes inside apples. Here’s what you need:
- 4 medium-sized apples (Granny Smith or Honeycrisp)
- 8 oz cream cheese, softened
- 1/2 cup granulated sugar
- 1/4 cup brown sugar
- 1 tsp vanilla extract
- 1/2 tsp ground cinnamon
- 1/4 tsp salt
- 1/2 cup sour cream
- 1/2 cup crushed graham crackers
- 1/4 cup chopped nuts (optional, walnuts or pecans)
- 1/4 cup caramel sauce (for drizzling)
- 1 tbsp lemon juice (to prevent browning of apples)
Variations
This recipe is wonderfully flexible! You can easily tailor it to suit your taste or dietary preferences. Here are some fun variations to try:
- Swap the nuts: If allergies are a concern or you’re looking for something different, consider using sunflower seeds or omitting them entirely.
- Change the fruit: While apples are fantastic, why not try pears or peaches for a twist? They work beautifully with the cheesecake filling!
- Add chocolate chips: For a decadent touch, fold in some mini chocolate chips into the cheesecake mixture before stuffing the apples.
- Try different toppings: Instead of caramel sauce, drizzle with chocolate syrup or sprinkle with powdered sugar for a lighter finish.
How to Make Cheesecake Stuffed Apples: A Delicious Twist on a Classic Dessert
Step 1: Preheat Your Oven
Before diving into preparations, preheat your oven to 350°F (175°C). This ensures that your apples cook evenly and turn out perfectly tender.
Step 2: Prepare the Apples
Wash the apples thoroughly under cold water and pat them dry. Carefully remove the core from each apple while keeping the bottom intact—this creates a delightful cavity ready to be filled.
Step 3: Prevent Browning
Drizzle a little lemon juice inside each apple. This not only adds some brightness but also keeps the flesh from browning as you prepare the filling.
Step 4: Make the Cheesecake Filling
In a large mixing bowl, combine softened cream cheese and granulated sugar. Beat on medium speed until smooth and creamy—about 2-3 minutes. This step is crucial as it ensures your filling is light and fluffy!
Step 5: Add Flavors
Next, mix in brown sugar, vanilla extract, ground cinnamon, and salt until well incorporated. The spices will enhance the warm flavors of your dessert.
Step 6: Incorporate Sour Cream
Add sour cream into your mixture and blend until fully combined. This makes your filling extra creamy and gives it that classic cheesecake taste.
Step 7: Fold in Crunch
Gently fold in crushed graham crackers and nuts (if using) with a spatula. These add texture to your filling and help create that wonderful cheesecake experience.
Step 8: Stuff the Apples
Fill each apple with your delicious cheesecake mixture using a spoon or piping bag. Pack it gently but firmly; you want those flavors snug inside!
Step 9: Arrange for Baking
Place the filled apples upright in a baking dish. If there’s any leftover filling, just spoon it around those lovely apples—it’ll bake up beautifully.
Step 10: Cover & Bake
Cover your baking dish with aluminum foil and bake it in the preheated oven for about 25-30 minutes until the apples are tender but still hold their shape.
Step 11: Brown Those Tops!
Remove the foil for an additional baking session of about 10-15 minutes. This allows those tops to brown slightly—a lovely contrast to all that creaminess inside!
Step 12: Cool & Serve
Let those gorgeous apples cool for about ten minutes before serving. Drizzle them with caramel sauce and sprinkle some extra cinnamon if you’re feeling fancy! For an extra treat, serve warm alongside vanilla ice cream or whipped cream.
Step 13: Store Leftovers
If you have any leftovers (though I doubt you will!), allow them to cool completely before storing in an airtight container in the refrigerator. They’ll keep for several days!
Now go ahead—enjoy this delightful dessert that’s sure to become a favorite addition to your recipe book!
Pro Tips for Making Cheesecake Stuffed Apples: A Delicious Twist on a Classic Dessert
Creating the perfect Cheesecake Stuffed Apples is all about attention to detail, and I’ve got some handy tips to help you achieve that delicious outcome!
-
Choose the Right Apples: Selecting firm apples like Granny Smith or Honeycrisp ensures they hold their shape while baking. This prevents them from turning mushy and allows for a delightful bite.
-
Soften Cream Cheese Properly: Make sure your cream cheese is at room temperature before mixing. This helps create a smooth and creamy filling without any lumps, making your cheesecake mixture perfectly velvety.
-
Don’t Overfill the Apples: While it’s tempting to pack in as much filling as possible, leaving a little space at the top allows the cheesecake to expand during baking without spilling over, resulting in an appealing presentation.
-
Experiment with Flavors: Feel free to customize your filling by adding chocolate chips, dried fruit, or even a splash of lemon zest for a refreshing twist. This personal touch can elevate your dessert experience!
-
Serve Warm: These apples are best enjoyed warm right out of the oven. The gooey filling combined with tender apple creates a comforting treat that everyone will love.
How to Serve Cheesecake Stuffed Apples: A Delicious Twist on a Classic Dessert
Serving these Cheesecake Stuffed Apples can be just as delightful as making them! With a few thoughtful touches, you can impress your family and friends.
Garnishes
- Chopped Nuts: Sprinkle some additional chopped walnuts or pecans on top for an added crunch that complements the creamy filling.
- Cinnamon Sugar: A light dusting of cinnamon sugar not only enhances the flavor but also adds an inviting aroma that will entice everyone to dig in.
- Fresh Whipped Cream: A dollop of homemade whipped cream adds a light and fluffy contrast to each bite of rich cheesecake and tender apple.
Side Dishes
- Vanilla Ice Cream: The classic pairing of warm apples with cold vanilla ice cream is always a hit. The creaminess of the ice cream balances out the warmth and sweetness of the dessert.
- Greek Yogurt: For a healthier option, serve with flavored Greek yogurt. It adds tanginess and richness without overwhelming sweetness.
- Spiced Tea: A warm cup of spiced tea can complement the flavors beautifully, making for a cozy dessert experience.
- Fruit Salad: A refreshing fruit salad made with seasonal fruits provides a light contrast and adds brightness to your plate, enhancing the overall dining experience.
With these tips and serving ideas, you’re all set to enjoy your Cheesecake Stuffed Apples! Happy baking!
Make Ahead and Storage
These Cheesecake Stuffed Apples are not only a delightful dessert but also fantastic for meal prep! You can easily make them ahead of time for gatherings or simply to enjoy throughout the week.
Storing Leftovers
- Allow the stuffed apples to cool completely before storing.
- Place them in an airtight container.
- Store in the refrigerator for up to 3 days.
Freezing
- If you want to enjoy these treats later, wrap each apple tightly in plastic wrap.
- Place wrapped apples in a freezer-safe container or bag.
- Freeze for up to 2 months. When ready to enjoy, thaw overnight in the refrigerator.
Reheating
- To reheat, place the stuffed apples in a microwave-safe dish.
- Heat on medium power for about 1-2 minutes until warmed through.
- Alternatively, you can bake them in a preheated oven at 350°F (175°C) for about 10-15 minutes.
FAQs
Here are some common questions you might have about Cheesecake Stuffed Apples.
Can I use different types of apples for Cheesecake Stuffed Apples?
Absolutely! While Granny Smith and Honeycrisp are great choices, you can experiment with other varieties like Fuji or Gala. Just ensure they’re firm enough to hold the filling!
How do I prevent my Cheesecake Stuffed Apples from browning?
Drizzling lemon juice inside the cavity of each apple before filling will help prevent browning and maintain their vibrant color.
Can I make Cheesecake Stuffed Apples ahead of time?
Yes! You can prepare these delicious apples a day in advance. Just store them in an airtight container in the fridge until you’re ready to bake.
What can I substitute for cream cheese?
If you’re looking for a lighter option, consider using a non-dairy cream cheese alternative or Greek yogurt for a tangy flavor while keeping it creamy.
Final Thoughts
I hope you’re as excited about making these Cheesecake Stuffed Apples as I am! This recipe brings together the comforting flavors of cheesecake and baked apples into one warm, cozy dessert that’s perfect for any occasion. Whether you’re treating yourself after a long day or sharing them with family and friends, I’m sure you’ll love every bite. Enjoy your baking adventure, and don’t forget to share your creations!
Cheesecake Stuffed Apples: A Delicious Twist on a Classic Dessert
If you’re in search of a dessert that embodies warmth and joy, look no further than these Cheesecake Stuffed Apples. This delightful twist on a classic combines tender, baked apples filled with a rich and creamy cheesecake mixture, all drizzled with sweet caramel sauce. They’re not only cozy and comforting but also incredibly easy to prepare, making them the perfect treat for busy weeknights or festive gatherings. With a balance of wholesome fruit and indulgent flavors, these stuffed apples are sure to impress everyone—whether it’s a dinner party or just a special treat for yourself.
- Prep Time: 20 minutes
- Cook Time: 45 minutes
- Total Time: 1 hour 5 minutes
- Yield: Serves 4
- Category: Dessert
- Method: Baking
- Cuisine: American
Ingredients
- 4 medium-sized apples (Granny Smith or Honeycrisp)
- 8 oz cream cheese, softened
- 1/2 cup granulated sugar
- 1/4 cup brown sugar
- 1 tsp vanilla extract
- 1/2 tsp ground cinnamon
- 1/4 tsp salt
- 1/2 cup sour cream
- 1/2 cup crushed graham crackers
- 1/4 cup chopped nuts (optional, walnuts or pecans)
- 1 tbsp lemon juice
Instructions
- Preheat your oven to 350°F (175°C).
- Wash apples thoroughly and remove the core while keeping the bottom intact.
- Drizzle lemon juice inside each apple to prevent browning.
- In a bowl, mix softened cream cheese and granulated sugar until smooth.
- Add brown sugar, vanilla extract, ground cinnamon, and salt; mix well.
- Stir in sour cream until fully combined.
- Gently fold in crushed graham crackers and nuts (if using).
- Fill each apple with the cheesecake mixture using a spoon or piping bag.
- Place filled apples upright in a baking dish; cover with foil.
- Bake for about 25-30 minutes until apples are tender.
- Remove foil and bake an additional 10-15 minutes to brown the tops.
- Cool for ten minutes before serving; drizzle with caramel sauce.
Nutrition
- Serving Size: 1 serving
- Calories: 280
- Sugar: 30g
- Sodium: 200mg
- Fat: 14g
- Saturated Fat: 7g
- Unsaturated Fat: 6g
- Trans Fat: 0g
- Carbohydrates: 38g
- Fiber: 3g
- Protein: 4g
- Cholesterol: 35mg

