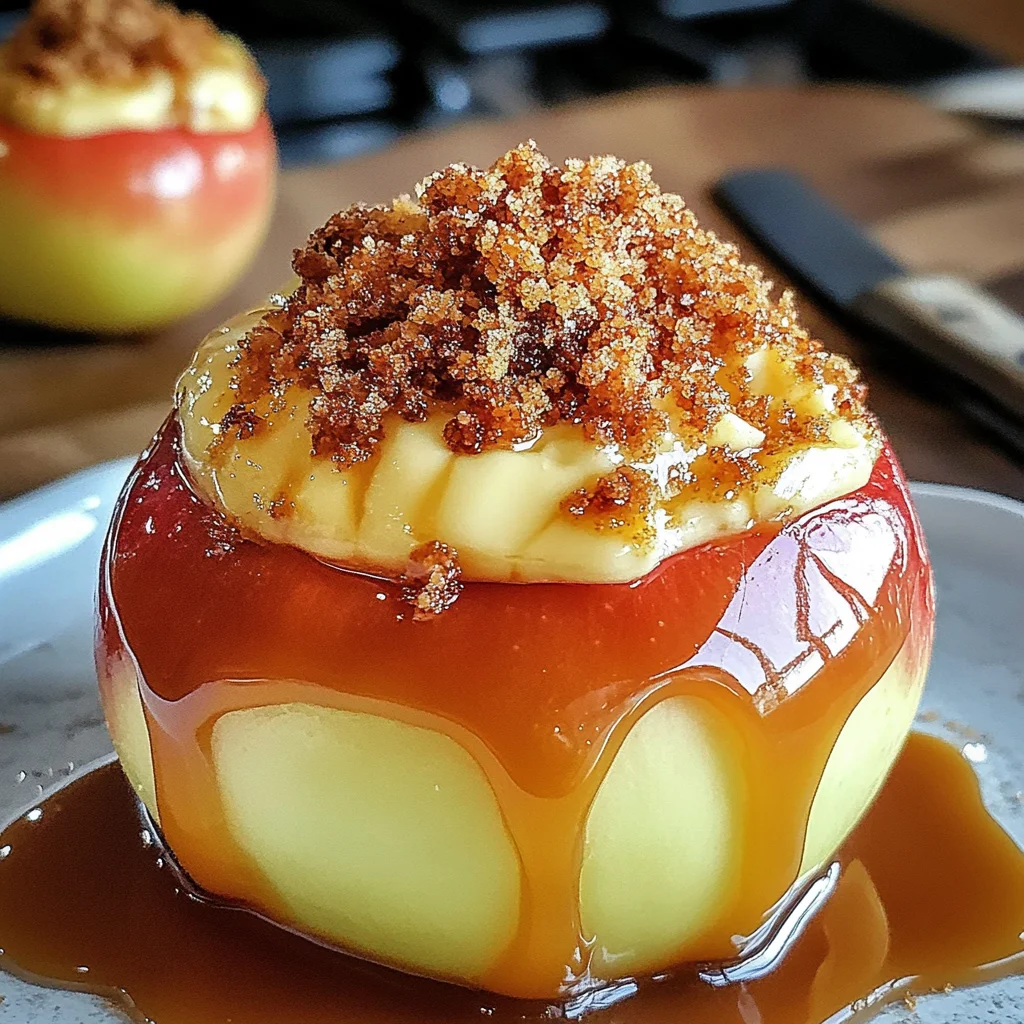
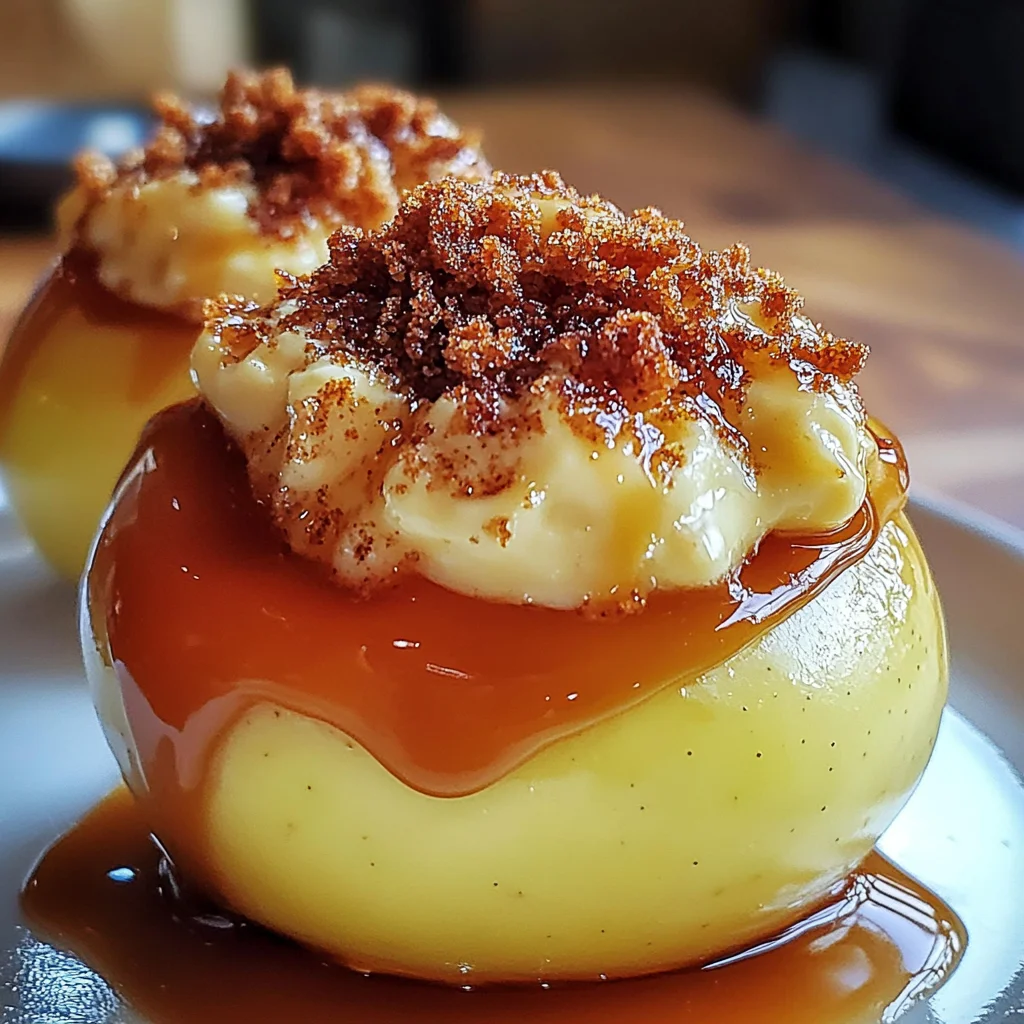
Cheesecake Stuffed Apples: A Delicious Twist on a Classic Dessert
If you’re looking for a dessert that’s both heartwarming and impressive, you’ve come to the right place! Cheesecake Stuffed Apples: A Delicious Twist on a Classic Dessert is a recipe that never fails to delight. Imagine tender, baked apples filled with a luscious cheesecake filling and topped with warm caramel sauce. It’s like enjoying two desserts in one bite! Whether you’re hosting a family gathering or just wanting to treat yourself after a long day, these stuffed apples are sure to bring smiles all around.
What makes this recipe even more special is how simple it is to prepare. With just a few wholesome ingredients, you can whip up something that feels indulgent without spending hours in the kitchen. Plus, they make your home smell heavenly while baking!
Why You’ll Love This Recipe
- Easy to Make: This recipe requires minimal prep time and uses straightforward steps, making it perfect for bakers of all levels.
- Family Favorite: Kids and adults alike will love the sweet combination of apples and creamy cheesecake.
- Make Ahead: These stuffed apples can be prepared in advance, so you can enjoy more time with your loved ones when it’s time to serve.
- Deliciously Versatile: You can easily customize the cheesecake filling or toppings based on what you have at home or your personal preferences.
Ingredients You’ll Need
Gathering the ingredients for these Cheesecake Stuffed Apples is part of the fun! You’ll find that they are all simple and wholesome. Here’s what you need:
For the Stuffed Apples
- 4 medium-sized apples (Granny Smith or Honeycrisp)
- 8 oz cream cheese, softened
- 1/2 cup granulated sugar
- 1/4 cup brown sugar
- 1 tsp vanilla extract
- 1/2 tsp ground cinnamon
- 1/4 tsp salt
- 1/2 cup sour cream
- 1/2 cup crushed graham crackers
- 1/4 cup chopped nuts (optional, walnuts or pecans)
- 1/4 cup caramel sauce (for drizzling)
- 1 tbsp lemon juice (to prevent browning of apples)
Variations
This recipe is wonderfully flexible, allowing you to get creative in the kitchen! Here are some fun variations to consider:
- Add Some Spice: Try adding nutmeg or ginger for an extra layer of flavor in your cheesecake filling.
- Fruit Twist: Mix in other fruits like blueberries or raspberries into the cheesecake mixture for a fruity surprise.
- Nutty Crunch: Swap out the graham crackers for crushed cookies or different nuts for varied textures.
- Chocolate Drizzle: Instead of caramel, melt some dairy-free chocolate and drizzle it over the top for a chocolatey twist.
How to Make Cheesecake Stuffed Apples: A Delicious Twist on a Classic Dessert
Step 1: Preheat Your Oven
First things first! Preheat your oven to 350°F (175°C). This step ensures that your apples bake evenly and become perfectly tender.
Step 2: Prepare the Apples
Wash the apples thoroughly under cold water and pat them dry. Carefully remove the core from each apple while keeping the bottom intact. This creates a lovely cavity ready to hold that delicious cheesecake filling!
Step 3: Prevent Browning
Drizzle a little lemon juice inside each apple. This prevents browning and keeps your apples looking fresh throughout baking.
Step 4: Make the Cheesecake Filling
In a large mixing bowl, combine softened cream cheese and granulated sugar. Beat on medium speed until smooth and creamy—about 2-3 minutes. Adding sweetness here forms a delightful base for your filling.
Step 5: Add More Flavor
Now it’s time to mix in brown sugar, vanilla extract, ground cinnamon, and salt. Stir until well combined; these ingredients add depth of flavor that pairs beautifully with our apples.
Step 6: Incorporate Sour Cream
Next up, add sour cream into the mixture. This ingredient gives our filling its rich texture while balancing out sweetness with its slight tang.
Step 7: Fold in Extras
Gently fold in crushed graham crackers and chopped nuts if you’re using them. This step adds crunchiness and makes every bite even more enjoyable!
Step 8: Fill Those Apples!
Using either a spoon or piping bag, fill each apple with your cheesecake mixture. Pack it gently but firmly—this helps keep everything together during baking.
Step 9: Arrange in Baking Dish
Place your filled apples upright in a baking dish. Spoon any leftover filling around them; this becomes extra delicious during baking!
Step 10: Cover and Bake
Cover your baking dish with aluminum foil to keep moisture locked in. Bake in your preheated oven for about 25-30 minutes until tender but not mushy.
Step 11: Brown the Tops
Remove the foil after baking time is up! Bake uncovered for an additional 10-15 minutes until the tops are slightly golden brown—this adds an appealing touch!
Step 12: Cool Before Serving
Let those scrumptious apples cool for about 10 minutes before serving them up warm. The waiting is tough but oh-so-worth-it!
Step 13: Drizzle & Serve!
Finish off by drizzling caramel sauce over each apple. Sprinkle some extra cinnamon if desired, then serve warm alongside vanilla ice cream or whipped cream for an unforgettable treat!
Now that you’ve made these delightful Cheesecake Stuffed Apples, I’m sure they’ll become a cherished favorite at your table too! Enjoy every bite!
Pro Tips for Making Cheesecake Stuffed Apples: A Delicious Twist on a Classic Dessert
Making Cheesecake Stuffed Apples can be a delightful experience, and with these helpful tips, you’ll ensure they turn out perfectly every time!
-
Choose the Right Apples: Opt for tart apples like Granny Smith or Honeycrisp. Their firmness helps them hold up during baking while balancing the sweetness of the cheesecake filling.
-
Soften Cream Cheese Properly: Ensure your cream cheese is at room temperature before mixing. This will make it easier to achieve a smooth, creamy texture in your filling without lumps.
-
Don’t Overfill the Apples: While it’s tempting to pack in as much filling as possible, leaving a little space at the top allows the filling to expand and prevents overflow during baking.
-
Experiment with Flavors: Feel free to add different spices like nutmeg or even a splash of almond extract to the filling. This can give your dessert a unique twist that complements the apples beautifully.
-
Serve Warm: Cheesecake Stuffed Apples are best enjoyed warm. The creamy filling paired with tender apple creates a cozy dessert that feels just right on any occasion.
How to Serve Cheesecake Stuffed Apples: A Delicious Twist on a Classic Dessert
Serving your Cheesecake Stuffed Apples beautifully can elevate your dessert game and impress your guests! Here are some creative ideas on how to present this delicious treat.
Garnishes
- Chopped Nuts: Sprinkle some additional chopped walnuts or pecans on top for added crunch and flavor.
- Whipped Cream: A dollop of whipped cream adds an airy contrast to the dense cheesecake filling.
- Cinnamon Sugar: Dusting a little cinnamon sugar over the top before serving gives it an appealing look and extra sweetness.
Side Dishes
-
Vanilla Ice Cream: The classic pairing! Creamy vanilla ice cream melts into warm apples, creating a delightful contrast in temperature and flavor.
-
Caramel Sauce Dipping Bowl: Serve alongside a small bowl of caramel sauce for those who want an extra drizzle with each bite.
-
Fresh Fruit Salad: A refreshing fruit salad made with seasonal fruits adds brightness and balances the richness of the cheesecake stuffed apples.
-
Coffee or Tea: Offering a warm beverage like coffee or herbal tea can round out the dessert experience, providing warmth and comfort after your meal.
With these serving suggestions and pro tips, you’re all set to enjoy and share your Cheesecake Stuffed Apples—a delicious twist on a classic dessert that everyone will adore!
Make Ahead and Storage
These Cheesecake Stuffed Apples are perfect for meal prep! You can prepare them in advance, allowing the flavors to meld beautifully and making your dessert planning a breeze.
Storing Leftovers
- Allow any leftover stuffed apples to cool completely.
- Place them in an airtight container.
- Store in the refrigerator for up to 3 days.
Freezing
- Wrap each stuffed apple individually in plastic wrap or aluminum foil.
- Place them in a freezer-safe container or bag.
- Freeze for up to 2 months. Thaw overnight in the refrigerator before reheating.
Reheating
- Preheat your oven to 350°F (175°C).
- Place the apples in a baking dish covered with foil.
- Heat for about 15-20 minutes, or until warmed through. You can drizzle with caramel sauce again before serving for extra deliciousness!
FAQs
Here are some common questions that may arise while making this delightful dessert.
Can I make Cheesecake Stuffed Apples ahead of time?
Absolutely! These apples can be prepared a day in advance and stored in the refrigerator until you’re ready to bake them. Just remember to cover them tightly!
How should I serve Cheesecake Stuffed Apples?
Serve these delicious stuffed apples warm, drizzled with caramel sauce. They pair wonderfully with vanilla ice cream or whipped cream for an extra treat!
What types of apples work best for Cheesecake Stuffed Apples?
Granny Smith and Honeycrisp apples are fantastic choices, as they hold their shape well during baking while providing a nice tartness that complements the sweet cheesecake filling.
Can I customize the filling of my Cheesecake Stuffed Apples?
Definitely! Feel free to add different flavors like chocolate chips, fruit preserves, or even spices such as nutmeg. The possibilities are endless!
How long do Cheesecake Stuffed Apples last?
When stored properly in the refrigerator, they can last up to 3 days. If frozen, they will keep well for about 2 months!
Final Thoughts
I hope you find joy and comfort in making these Cheesecake Stuffed Apples! This recipe is not just a treat; it’s a wonderful way to share warmth and sweetness with family and friends. Enjoy every bite and feel free to experiment with your favorite toppings and flavors. Happy baking!
Cheesecake Stuffed Apples: A Delicious Twist on a Classic Dessert

Indulge in the heartwarming delight of Cheesecake Stuffed Apples, a charming twist on a classic dessert. These tender baked apples are filled with a creamy cheesecake mixture that perfectly balances sweetness and tartness. Drizzled with warm caramel sauce, each bite feels like a comforting hug, making this dessert perfect for family gatherings or cozy nights in. With minimal prep time and simple ingredients, these stuffed apples are not only easy to make but also fill your kitchen with a delightful aroma as they bake.
- Prep Time: 15 minutes
- Cook Time: 45 minutes
- Total Time: 1 hour
- Yield: Serves 4
- Category: Dessert
- Method: Baking
- Cuisine: American
Ingredients
- 4 medium-sized apples (Granny Smith or Honeycrisp)
- 8 oz cream cheese, softened
- 1/2 cup granulated sugar
- 1/4 cup brown sugar
- 1 tsp vanilla extract
- 1/2 cup sour cream
- 1/2 cup crushed graham crackers
- 1/4 cup chopped nuts (optional)
- 1/4 cup caramel sauce (for drizzling)
- 1 tbsp lemon juice
Instructions
- Preheat your oven to 350°F (175°C).
- Wash and dry the apples, then carefully remove their cores.
- Drizzle lemon juice inside each apple to prevent browning.
- In a bowl, mix softened cream cheese and granulated sugar until smooth.
- Add brown sugar, vanilla extract, cinnamon, and salt; combine well.
- Mix in sour cream for added richness.
- Fold in crushed graham crackers and optional nuts.
- Fill each apple with the cheesecake mixture and place upright in a baking dish.
- Cover with foil and bake for 25-30 minutes until tender.
- Remove foil and bake uncovered for an additional 10-15 minutes until tops are golden brown.
- Let cool for about 10 minutes before serving warm with caramel drizzle.
Nutrition
- Serving Size: 1 stuffed apple (approximately 150g)
- Calories: 320
- Sugar: 36g
- Sodium: 260mg
- Fat: 14g
- Saturated Fat: 7g
- Unsaturated Fat: 5g
- Trans Fat: 0g
- Carbohydrates: 44g
- Fiber: 3g
- Protein: 5g
- Cholesterol: 35mg